san pedro cactus tea Shop 'San Pedro Cactus - Echinopsis pachanoi' Care and Growing Guide
SKU: 5958650698
san pedro cactus tea

san pedro cactus tea Shop 'San Pedro Cactus - Echinopsis pachanoi' Care and Growing Guide

Sale price$25.89 Regular price$28.77
Save 10%

Shipping Estimate
USA
  • USA
  • CAN

Ships within 48 hours · Estimated delivery Jul 7 - Jul 12

Promo Codes Available:

For Your Every Summer RSVP, with Code: SUMMER15

Description

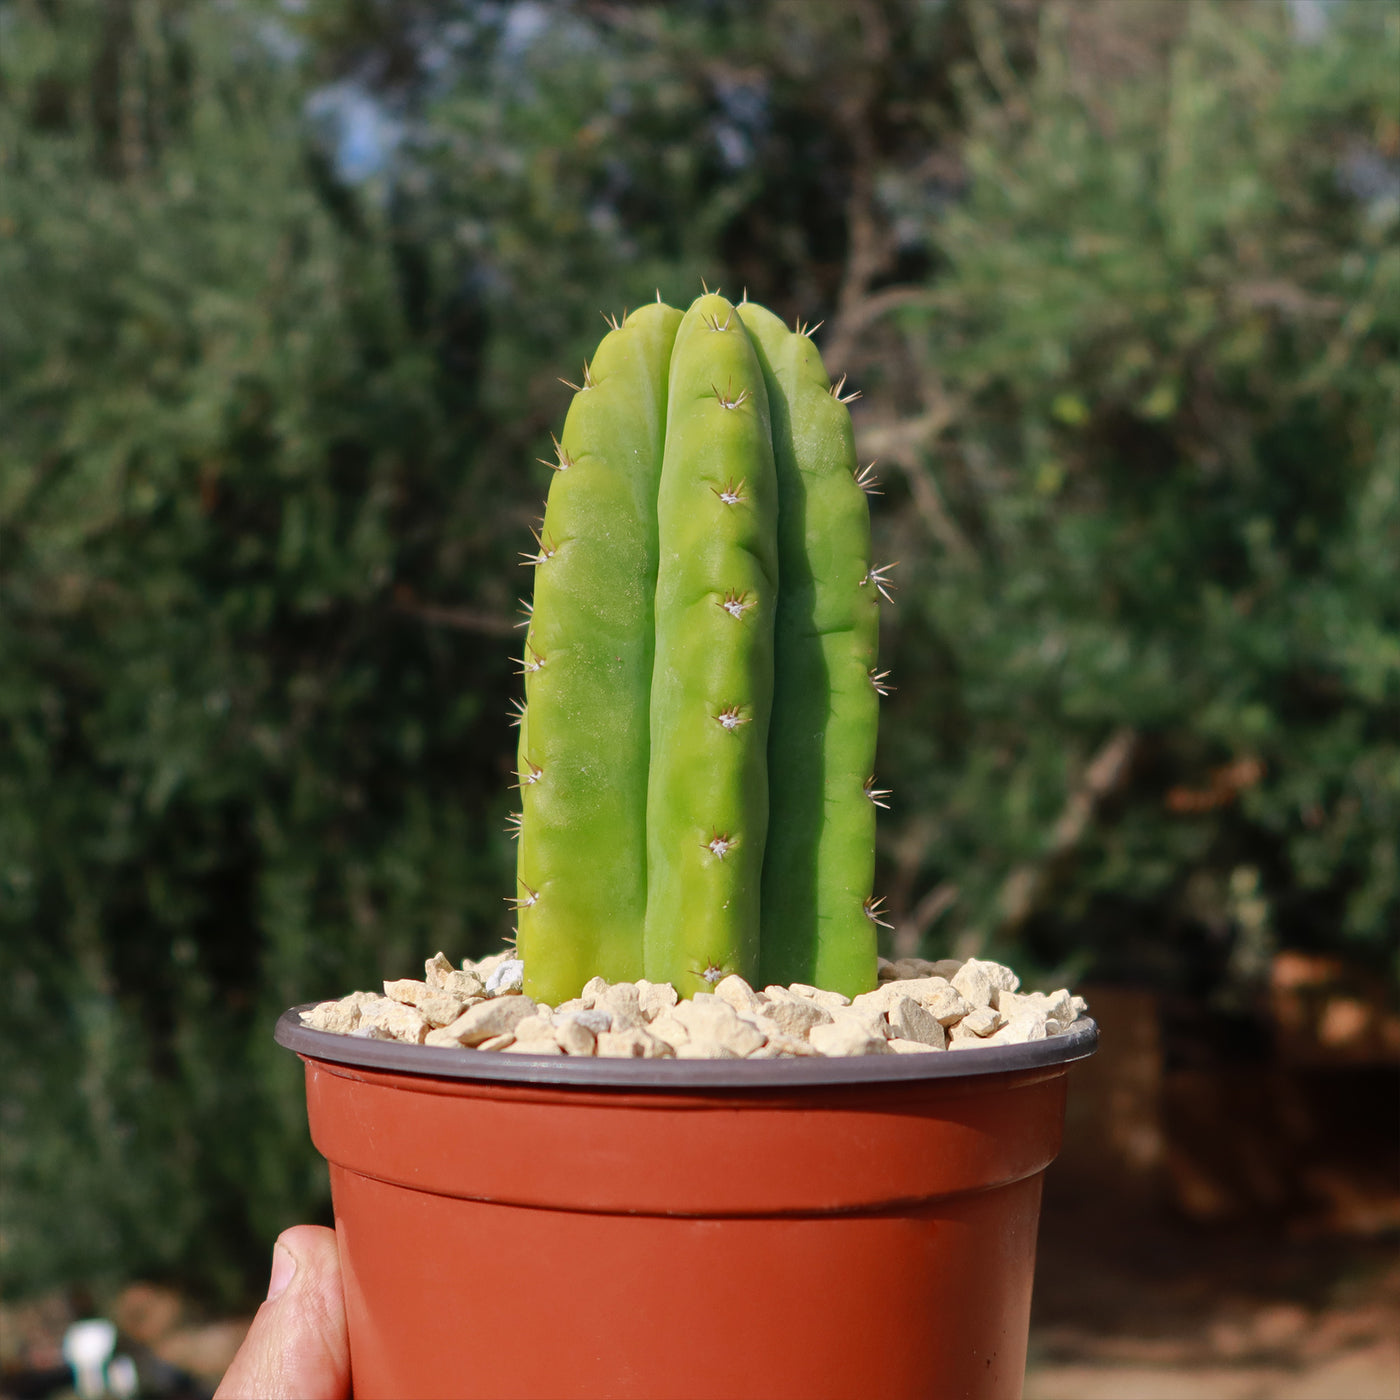
san pedro cactus tea Shop 'San Pedro Cactus - Echinopsis pachanoi' Care and Growing GuideIntroducing the San Pedro cactus, also known as Echinopsis pachanoi (Syn. Trichocereus pachanoi) or Trichocereus Echinopsis pachanoi, which is among the superstars of the cactus world. This fast growing columnar cactus is also known as the Wachuma and Huachuma. Standing tall and proud, this magnificent San Pedro cactus columnar beauty can reach heights of up to 20 feet and spread its branches wide, up to six feet! With stems that range from vibrant

Introducing the San Pedro cactus, also known as Echinopsis pachanoi (Syn. Trichocereus pachanoi) or Trichocereus Echinopsis pachanoi, which is among the superstars of the cactus world. This fast-growing columnar cactus is also known as the Wachuma and Huachuma. 

Standing tall and proud, this magnificent San Pedro cactus columnar beauty can reach heights of up to 20 feet and spread its branches wide, up to six feet! With stems that range from vibrant green to mesmerizing blue-green shades, San Pedro is a true showstopper in any landscape. As your San Pedro cactus plant matures, its colors deepen and intensify, adding even more charm to its already captivating presence.  


When the San Pedro cactus flowers bloom, they emit a sweet fragrance that attracts pollinators like bees and butterflies.

The flowers are usually large and trumpet-shaped and come in various colors, including white, cream, and yellow. The petals have a delicate texture and often have a waxy appearance.

The fragrant flowers usually open during the day and close at night. They have a short blooming period, typically lasting for a day or two.

During the blooming season, which usually occurs in late spring or early summer, multiple flowers can bloom at once, creating a captivating sight.

The San Pedro cactus flowers are not only visually appealing but also have cultural significance. In some indigenous cultures, the flowers are used in traditional ceremonies and rituals. They are believed to have spiritual and healing properties.

The San Pedro cactus also has Pitahaya red San Pedro cactus fruits. These fruits are known for their sweet and refreshing flavor, making them a popular choice for consumption. Additionally, they are rich in antioxidants and vitamins, providing numerous health benefits.  

When and How to Water Your San Pedro Cactus 

San Pedro cactus is a drought-tolerant plant that can survive in dry conditions for long periods of time. However, regular watering is still needed to stay healthy. Generally, the San Pedro needs to be watered once every two weeks. During the summer months, when temperatures are high and the plant is actively growing, it may need to be watered more frequently.  

When watering your Trichocereus Echinopsis pachanoi, be sure to soak the soil thoroughly and allow it to drain completely. To prevent root rot and other issues, avoid overwatering.The leaves may become dry and brittle, and the cactus may stop growing if it is underwater. Over time, the San Pedro cacti may start to lose their shape and become misshapen.  

In addition to these physical symptoms, underwatering can also make the cactus more susceptible to pests and diseases. To keep your San Pedro cactus healthy and thriving, it is important to water it regularly and provide it with the right growing conditions. 

Light Requirements - Where to Place Your San Pedro Cactus

When grown indoors, your San Pedro cactus should be placed in a bright, sunny location where it can receive at least six hours of direct sunlight each day.

For outdoor cultivation, the San Pedro cactus requires a lot of sunlight to grow and thrive.

In its natural habitat, this cactus is exposed to direct sunlight for 4-6 hours each day.

If you live in an area with a lot of cloud cover or limited sunlight, you may need to supplement your cactus's light with artificial grow lights.

So, let's give your San Pedro cactus plant what it deserves—just the right amount of light to bloom into the ultimate showstopper! 

But beware; too much sun can lead to burns, so make sure you gradually increase exposure or bring it indoors during a heatwave. And if your Echinopsis pachanoi isn't getting enough light, it'll start stretching toward its source.

Optimal Soil & Fertilizer Needs 

Use well-drained soil that is designed specifically for your Echinopsis pachanoi cactus. These specialty soil mixes have been precisely developed to imitate well-draining desert soils. Commercial cactus soil is affordable and available online or at Home Depot.

Planet Desert specializes in cacti and has a specialty cactus potting mix that contains 5 natural substrates and organic mycorrhizae to promote the development of a strong root system that helps your San Pedro cactus thrive. 

When it comes to fertilizing your San Pedro cactus plant, it only needs a small amount of fertilizer applied once a year in the spring. Cacti prefer fertilizer with lower doses of NPK, with a maximum ratio of 5-10-5 which is higher in phosphorus than nitrogen. Remember, overfertilization can lead to root rot or even the death of the plant, so be cautious! 

Hardiness Zones & More 

San Pedro cactus is a hardy plant that can grow in a variety of different climates. It is native to the Andes Mountains, where it can be found growing at high altitudes in a range of temperatures. In the United States, San Pedro cactus is typically grown in warm, dry climates such as those found in the southwestern states. 

When growing indoors, the San Pedro cactus prefers a warm and dry environment. It thrives in temperatures ranging from 55°F to 75°F. Aim for a humidity level of around 40% to 50% to create an ideal indoor environment for your San Pedro cactus.

For outdoor cultivation, this cactus is hardy in USDA zones 8–11, which means that it can tolerate temperatures as low as 20 degrees Fahrenheit.

If you live in an area with extreme temperatures, you may need to take extra precautions to ensure that your San Pedro cactus Echinopsis pachanoi, stays healthy. 

In addition to its hardiness zone, it is also important to consider the humidity requirements of the San Pedro cactus. This cactus is adapted to dry, arid environments and does not require a lot of humidity to grow. In fact, high levels of humidity can be detrimental to the health of the plant, as they can promote the growth of mold and fungal diseases. 

When growing San Pedro cactus, it is important to provide good air circulation and avoid overwatering to prevent the buildup of excess moisture around the base of the plant.

Wildlife - San Pedro Cactus Attracts the Following Friendly Pollinators

The San Pedro Cactus flowers attract several friendly pollinators such as bees, butterflies, and hummingbirds. These pollinators are essential for the reproduction of the cactus and play a crucial role in maintaining the ecosystem's biodiversity.

Butterflies
Bees
Hummingbirds
Lady Bugs
Multi Pollinators
Other Birds

According to ASPCA, the San Pedro Cactus is safe for humans but can be mildly toxic to cats and dogs if ingested in a large amount. However, it is safe to touch and handle, making it a popular choice for ornamental cactus gardens. However, it is important to keep San Pedro Cactus out of reach of pets to prevent accidental ingestion.

How to Propagate Your San Pedro Cactus

Propagating the San Pedro cactus can be done through seeds or cuttings, but each method has its pros and cons. While cuttings are a quicker option, this method involves cutting off the top of the plant, which permanently alters its tall, elegant columnar form. For this reason, propagation by cuttings is only recommended if the plant has already broken or been damaged. In such cases, you can take a healthy segment, allow it to be callous for about a week, and plant it in well-draining soil to root. However, this approach is less ideal for those who wish to maintain the plant's natural aesthetics.

Seed propagation is a method for cultivating new cacti plants, and preserving their beauty. Harvested from mature cacti's fruit, seeds are cleaned, dried, and sown onto a well-draining soil mix. Despite the patience required, this method allows for healthy plants without compromising the parent cactus's appearance, despite the need for indirect sunlight or grow light.

Key Takeaways

  1. Unlike many other cacti, the San Pedro grows quickly, often reaching heights of 10–20 feet under ideal conditions, making it a popular choice for ornamental gardens.
  2. This cactus is highly adaptable, thriving in a variety of climates and requiring minimal care. It is drought-tolerant, hardy in USDA zones 8–11, and grows well in nutrient-rich, well-draining soil.
  3. San Pedro Cactus is a drought-tolerant that thrives in arid conditions and requires minimal watering. It is a popular choice for xeriscaping and landscaping in dry climates due to its ability to store water in its fleshy stems.

Final Thoughts

Overall, the San Pedro cactus (Echinopsis pachanoi) is a remarkable plant with unique features. It is characterized by its tall, columnar shape and beautiful white or yellow flowers. The cactus can grow to impressive heights, reaching up to 20 feet in optimal conditions. Its spines are relatively short and are arranged in clusters along the ridges of the cactus. The San Pedro cactus is a low-maintenance plant that thrives in well-draining potting soil and enjoys ample sunlight. It prefers a dry environment and can tolerate drought, so it should be watered sparingly, allowing the soil to dry out between waterings.

Don't miss out on this opportunity to add something truly exceptional to your garden. Buy San Pedro cactus for sale today to enhance your collection! 

Shipping Notes
  • Free Standard Shipping on $100+ Orders to the USA.
  • Except Preorder products are shipped in 48 hours.
  • Delivery to the USA:
  1. Standard Shipping : 3-10 business days
  • If time is of the essence, please consider selecting expedited delivery for faster service.
Exchange/Return Notes
  • We offer a 30-day return/exchange service after receiving.
  • Final sale items are not eligible for returns or exchanges.
  • To process your return/exchange, please contact us at [email protected]
  • Please click here for more details>>> Return & Exchange Policy
SKU: 5958650698

Discover Niche Categories That Outsell san pedro cactus tea

Top-Converting Item to Boost Your Average Order

4.4 ★★★★★
Based on 2340 reviews
Sort
Highest Rating
Newest First
Oldest First
Product Reviews
E
Verified Purchase
Eric J. Jenislawski
West Palm Beach, US
★★★★★ 5
Great result, exceptional value, and easy, forgiving application.
Size: TRIM COAT KIT
I am thoroughly pleased with the results of this product, and the application was easier than I expected. Outstanding stuff. I am writing a longer review in case it helps people who are unsure about a "once and done" product that calls itself permanent. It's not hard to apply. It is forgiving and there's time to even it out. But here are some things to anticipate. My use case: I used Cerakote to restore the plastic trim on a used 2014 black Dodge Challenger that had been repainted but the plastic trim was original and it had been kept outside by the prior owner, so the contrast between the new paint and faded trim was noticeable. The trim was originally a deep, dark gray (it is never as black as the paint). It had faded to a medium-gray in many places: running boards on the side beneath the door, below the read bumper (which were also somewhat worn from debris), around the tail lights, and the plastic piece beneath the windshield wipers between the windshield and the hood. These were all looking weathered. The trim was very oxidized in some places, chalky grey near the hood and around the back bumper. The plastic around the tail lights also had light streaks in it from where water drains down from the trunk. What else I tried before I tried Cerakote: I got middling results from Mother's Back to Black. It looked somewhat better for a week or two, and then it went back to looking as before. Not impressed. I got a tip online to try rubbing the plastic trim with a melamine magic eraser, so I did that next, and this made a significant difference. Melamine is abrasive, so be careful if you do this on your trim. I went gently, up-and-down, side-to-side and in small circles, by hand, with gentle pressure like one would with a polishing compound. By removing the oxidation, the plastic was a few shades darker in the worst spots and the streaking on the rear tail light piece was gone. The rough spots on the trim at the bottom of the car and around the wheels looked somewhat better. But it certainly did not "like new." Cerakote experience: I decided to give Cerakote a try based on the video and good reviews. Bam! Back to factory-like deep dark gray. I wish I had taken pictures. It's incredible. Fully satisfied! I had already washed the trim with Dawn dish soap. I started with the trim bone dry. You are warned everywhere that water droplets will ruin the result, so don't expect to do this process right after you wash the car unless you like to live dangerously and have compressed air to spray cracks and crevices. I was worried that application would be streaky if I didn't do it right. Not so. It is forgiving. Here's what I learned. 1) The first 20% of what you'll get out of the packet goes on heavy with the lightest touch. One packet goes a long way. The next 60% is the "normal" application. This goes on the easiest. You can really milk the last drop out of each towelette, but I didn't because the last 20% of what you can get out of it by rubbing it really hard comes out very light and is not worth the uneven application unless you have some random area you don't care much about and want to use the remainder for that. I only used 5 packets to do the whole car. When you start a new packet, the beginning is where you might want to go back later and even it out once the application gets more normal. Or better, start a new packet on a big section to spread it around well and then move to smaller trim when the towelette is less fresh. 2) You've got time to work with it and make corrections. It stayed liquid like water for at least 20 minutes in my conditions: about 80 degrees, not very humid, indirect sunlight on an 80 degree car. Don't apply in direct sun or on a hot car. The product then gets sticky as it cures, but you can still work with it during the sticky time, rubbing it in and spreading it evenly with the towelette. I did not use a microfiber to "knock down" heavy spots. I just came back around with the towelette. I think a dry microfiber might pull off too much product. When it is half-cured, it is sticky and you can buff it with the towelette at this stage to further flatten and even things out. Work in sections, one piece of trim at a time. 3) Overlaps won't show as long as you rub it all in thoroughly. I tried the overlapping parallel passes method that they recommend, and this works pretty well. I was worried that I might get a "double heavy" streak where the passes overlap but this not so unless the towelette is fresh, but this is fixable. You can do a pretty natural, casual back-and-forth motion for the most part and it comes out fine. This is NOT a super-finicky product. I made a second or third back-and-forth pass in a few areas, and used circular motion in some places where the trim was textured or a little rough from wear, and it all looked even in the end. Just rub it down into the plastic and even out the sheen while it is uncured and it's good. 4) It cures like you see it when it's still wet. It doesn't lighten up very much as it cures. It just looks a little less wet. So get it right by eye when it is wet and that's pretty much what you will still have in an hour when it is cured. 5) Don't miss a spot! You'll see it for sure if you do because the different is so dramatic. And a "second coat" is not easy or recommended. This is the only once-and-done part that you want to get right, and you have plenty of cure time to be thorough. 6) Use the folded corner of the towelette to get into small corners and edges, like where the trim meets the paint or has an inside corner or some little nook. A fresh towelette is great for getting into small areas because a feather touch applies plenty of product when the towelette is fresh. The trim now looks amazing and I am entirely satisfied. I will use Cerakote on my other vehicles. The only minor con is a strong ammonia smell when you are up close to it while it is wet. No smell once it is cured. I would definitely wear the recommended gloves while applying. As others say, you will probably drop that towelette on the ground. It's slippery when wet. Keep it folded in quarters as it comes for ease of application. Turn to a new quarter once a side gets dirty or dry and fold it inside out for four more quarters to use. Bonus, but off-label -- at your own risk: The product is not intended for the soft rubber around the windows, but I tried it there too, and it looks amazing. All I did was wash the rubber with dish soap like the trim, and I rubbed it a few times with a wet microfiber cloth to get the superficial layer of oxidized rubber off. Then I applied Cerakote. It looks great. The rubber used to be blotchy and faded. The microfiber evened this out a little. I would not use melamine on the rubber -- this made it look worse in a test section. The Cerakote made it look great: jet black, much shiner, and much more even looking. Not quite "brand new" but far better than I thought possible. I thought I might need to replace the rubber. Now it's looking great next to the jet-black new paint. This afterthought use alone was worth the money. Can you apply a second coat the next day? They don't say you can, and I don't recommend it. This is meant to be one-shot, which is why you should check to make sure you don't miss any spots. I had two areas where I tried a second coat the next day. The first was on the plastic trim between the windshield and the hood. I didn't rub this trim much with melamine beforehand so there was a lighter area (light grey originally, the worst spot) that didn't get as black as the other sections so I did it again, which helped a little, but not much. I didn't wash this area with soap beforehand because I wasn't intending to fix it until I got going. Once you put things back to black you will start noticing other faded things more. Likewise, I did a second coat on the very top of the soft rubber at the bottom of the windows (the part which faces upward and thus gets the most sun), it wasn't as shiny as the other parts, so I went over that section gently again the next day with a fresh towelette. As soon as I did it, I thought it was a mistake. This didn't go well initially because the cured coating is very hydrophobic so the new, wet, Cerakote of the second coat goes on smooth initially and then "puddles up" into little droplets a few minutes later. It doesn't want to stick to the first coat. I thought I had messed it up, but I let it cure a little until the sticky phase, and spread it out again with the towelette. It stayed that time but gathered back a little into some streaks. I spread it once more a few minutes later and it looked good. It stayed even. It looks just fine a few days later, so I think it cured OK. I hope this product last for months as advertised. Even if it doesn't I would totally do it again because the results are superior, I still have half my towelettes left, and the product is not expensive. 10/10 would do again and will recommend to everyone.
WAS THIS REVIEW HELPFUL?YesReportShare
Reviewed in the United States on June 25, 2025
R
Verified Purchase
Robert Barger
New York, US
★★★★★ 5
Easy to use, amazing results
Size: TRIM COAT KIT
This is an awesome product that is easy to use and has amazing results. My plastic trim never looked so good.
WAS THIS REVIEW HELPFUL?YesReportShare
Reviewed in the United States on May 14, 2026
N
Verified Purchase
NorthFloridaLT
San Leandro, US
★★★★★ 5
Made My Bumper Look Brand New Again
Size: TRIM COAT KIT, Size: TRIM COAT KIT
I used this on the plastic trim and bumper on my truck, and I’m honestly impressed with how it turned out. The faded areas came back to a deep, rich black and really cleaned up the whole look of the rear end. I prepped everything the right way by washing it first with an all purpose cleaner, then wiping it down with 91% alcohol. I also taped off the surrounding paint and chrome just to be safe. After that, the application was simple and went on smooth without any streaks or blotchy spots. The difference was immediate. What used to look dull and worn now looks factory-fresh again. It also seems to bond well and not just sit on the surface like some cheaper products I’ve tried before. Overall, this was easy to use, gave great results, and made a noticeable improvement. I would definitely use it again on other trim pieces.
WAS THIS REVIEW HELPFUL?YesReportShare
Reviewed in the United States on April 12, 2026
E
Verified Purchase
E N.
Lowell, US
★★★★★ 4
Good product
Size: TRIM COAT KIT
Good coverage. I've had it on for about 10 days, and it's holding up better than any spray product I've used. Not perfect, but none of those streak lines you get with other products. It's been rained on twice so far.
WAS THIS REVIEW HELPFUL?YesReportShare
Reviewed in the United States on May 8, 2026
E
Verified Purchase
ernieupton
Chelsea, US
★★★★★ 5
good product and value
Size: TRIM COAT KIT
worked great on the 10yr old outback. Lasted several months..until we traded it in for a new outback.. will find something else to use it on...!
WAS THIS REVIEW HELPFUL?YesReportShare
Reviewed in the United States on May 20, 2026

recommand products