Shipping Estimate
USA
- USA
- CAN
- USA
- CAN
Ships within 48 hours · Estimated delivery Jul 7 - Jul 12
For Your Every Summer RSVP, with Code: SUMMER15
Description
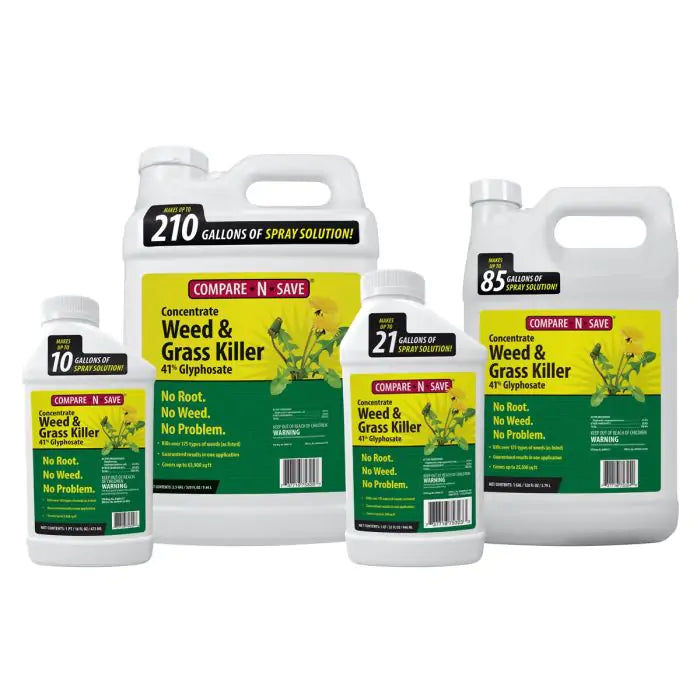
41 glyphosate herbicide mixing chart Ragan & Massey Compare-N-Save Concentrate Grass and Weed Killer 41% Glyphosate - Ranson, WVGet to the root and kill grass and weeds with Compare N Save 41 percent Glyphosate Concentrate Grass and Weed Killer. Use for lawn or garden replacement, on patios, walkways, or in and around fences and gardens to remove unwanted grass and weeds. Visible results in as little as 2 to 4 days. Kills all grass and weeds. Rainproof in 2 hours Contains 41 percent glyphosate For Best Results: For best results, apply on a warm sunny day when daytime
Get to the root and kill grass and weeds with Compare-N-Save 41-percent Glyphosate Concentrate Grass and Weed Killer. Use for lawn or garden replacement, on patios, walkways, or in and around fences and gardens to remove unwanted grass and weeds.
- Visible results in as little as 2 to 4 days.
- Kills all grass and weeds.
- Rainproof in 2 hours
- Contains 41-percent glyphosate
For Best Results: For best results, apply on a warm sunny day when daytime temperature is above 60°F and no rainfall is forecast for 24 hours. Because this herbicide will kill all green plants including lawn grass it is not recommended for spot spraying in lawns.
Kills To The Root: Be sure to spray the foliage of the treated plants and avoid any spray mist drifting to plants you do not wish to treat. Glyphosate is absorbed through the foliage and travels to the root to kill the plant.
Mixes Easily With Water: Use 1.5 ounces (3 tablespoons) of concentrate in 1 gallon of water for general weed control. For tougher weed control of perennials or brush, mix 2.5 ounces (5 tablespoons) in 1 gallon of water. One gallon of ready-to-use equivalent will cover 300 square feet.
No Residual Activity: Glyphosate is a post-emergent herbicide. It will not prevent new or future growth. Treated areas can be replanted in as little as one day in ornamental areas. See the label for a complete list of when to replant fruits and vegetables.
WHERE TO USE:
| Around farm buildings and barns | Driveways | Agricultural uncultivated areas |
| Ornamental gardens | Gravel paths | For establishment and maintenance of wildlife openings. |
| Roadsides | Along fences | Walkways |
| Parking areas | Farmyards | Mulch beds |
| Vacant lots | Lawn replacement |
WHEN TO USE:
Use any time weeds are actively growing. Most treated weeds show initial symptoms in 2 to 4 days and complete kill in 1 to 2 weeks. Larger more established weeds may take up to 4 weeks for complete kill.
For best results, apply on a warm, sunny day when daytime temperature is above 60°F and no rainfall is forecast for 24 hours. Warm, sunny weather will speed up weed control.
Apply only when air is calm. If necessary, use cardboard or plastic to shield desirable plants.
Reapply if it rains within 2 hours after application. Rainfall or watering 2 hours after application will not wash away effectiveness.
HOW TO USE:
To apply this product, use
- Plastic, aluminum or stainless steel tank sprayer
- Other hose-end sprayer recommended for weed killers
- Hand-trigger sprayer
Do not use or store solutions of this product in galvanized steel or unlined steel sprayers, or apply through any type of irrigation system or with a sprinkling can.
Rinse sprayer and flush all sprayer components with water 3 times after use. Spray rinse water on bare soil or gravel. After very thorough cleaning, sprayer may be used to apply other products. Close cap tightly after use.
General Weed Control
Use along fences, paths, patios, sidewalks, driveways and in brick and gravel walkways, around trees, shrubs, ornamental plantings and flower beds, and around buildings. Use to trim and edge landscape areas.
Spot Spraying
Use on actively growing weeds in and around flower beds, ornamental trees, fruit and nut trees, grapevines, shrubs, fences, driveways and walkways. Make sure Concentrate Grass & Weed Killer 41% Glyphosate does not contact the leaves, green stems or exposed roots of plants you don’t want to kill. Concentrate Grass & Weed Killer 41% Glyphosate will not move in or on the soil to untreated plants. If used to control weeds around fruit or nut trees or grapevines, allow 21 days before eating the fruit or nuts.
Landscaping
Use to prepare areas for planting of ornamentals, trees, shrubs, desert landscapes, rock gardens, flower beds or similar plantings. Treated areas can be replanted 1 day after treatment.
Lawn Renovation
Use to kill existing weeds and grasses including the old lawn. For best results, apply in spring or fall, when daytime temperatures are at least 60°F. See label for complete lawn renovation instructions.
Brush Control
Use when brush is green and growing. If plants are taller than 5 feet, cut back and spray regrowth. Brush sprayed in the fall may not be fully controlled until the following season. Hard-to-control species such as blackberry, kudzu or poison oak may require a second application.
Stump Treatment
Stumps can be treated to prevent regrowth. For best results, treat when the vegetation is actively growing and within 5 minutes of being cut down. See label for further instructions. Treatment will control or suppress many types of woody brush and trees, such as alder, bluegum, eucalyptus, madrone, oak, giant reed, saltcedar, sweetgum and tan oak.
Vine Control
- If vine is growing up a pole, fences, or mature tree trunk, cut vine to a height of 3 to 4 feet and spray to thoroughly cover remaining vine.
- If vine is climbing a shrub or immature (green) tree trunk, cut vines at base and spray its regrowth. Shield shrubs and green bark from spray drift with a sheet of cardboard or plastic.
PRECAUTIONS:
Concentrate Grass & Weed Killer 41% Glyphosate is an all-purpose weed and grass killer which will kill almost all plants it contacts. DO NOT use for spot weed control in lawns since Concentrate Grass & Weed Killer 41% Glyphosate kills all green plants, including lawn grass.
If necessary, use cardboard or plastic to shield desirable plants. If plants are accidentally sprayed, rinse off immediately with water. Spray when air is calm. Spray to evenly wet the weed.
ACTIVE INGREDIENTS:
| Glyphosate, isopropylamine salt | 41.0% |
| Other Ingredients | 59.0% |
| Total: | 100.0% |
DISCLAIMER:
It is a violation of Federal law to use this product in a manner inconsistent with its labeling. Read the entire label before each use. Use only according to label instructions.
See the complete label for specific use rates and detailed instructions.
Consult the Safety Data Sheet (SDS) for important safety information.
Shipping Notes
- Free Standard Shipping on $100+ Orders to the USA.
- Except Preorder products are shipped in 48 hours.
- Delivery to the USA:
- Standard Shipping : 3-10 business days
- If time is of the essence, please consider selecting expedited delivery for faster service.
Exchange/Return Notes
- We offer a 30-day return/exchange service after receiving.
- Final sale items are not eligible for returns or exchanges.
- To process your return/exchange, please contact us at [email protected]
- Please click here for more details>>> Return & Exchange Policy